Step 2 – Download and install ADB Driver on your computer.
Step 3 – Download TWRP Flasher Toolkit from the link above to your computer. Extract the zip file using WinZip, WinRAR, 7zip, etc.
Step 4 – Enable USB Debugging on your phone. Doing so is super easy. First, go to Settings >> About Phone >> Tap MIUI version 7 times or more >> Congratulation you are now a developer. Next, go to Settings >> Additional Settings >> Developer Options >> Enable USB Debugging.
Step 5 – Go to the TWRP FLASHER POCO X3 folder extracted from the file you downloaded above.
Step 6 – Connect your phone to the computer using its USB cable. Make sure the phone switched on.
Step 7 – Launch up the POCOX3NFC-TWRP file by double-clicking on it.
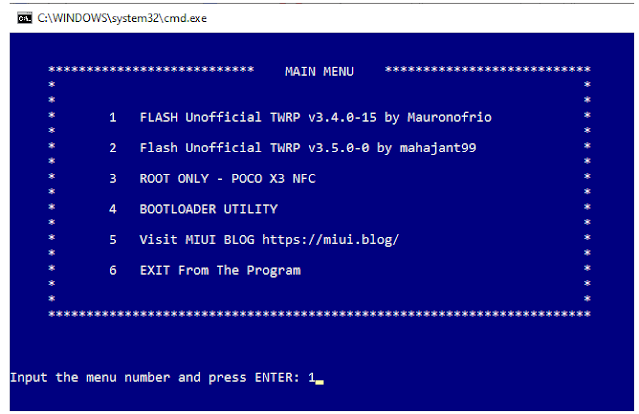
Step 8 – Press any key to continue. You’ll go to the main menu.
Step 9 – Choose menu number 1 or 2. Type either 1 or 2 then press Enter.
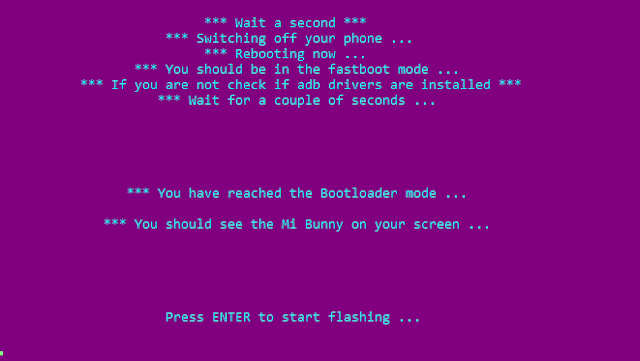
Step 10 – Make sure USB Debugging is enabled. Simply press any key to continue since we have done this since step 4 above.
For full use of the forum you need to register. Registration takes only 1 minute and after that you can enter and read topics. So don't hesitate and register now!
This site uses cookies to help personalise content, tailor your experience and to keep you logged in if you register.
By continuing to use this site, you are consenting to our use of cookies.